Forms and Advanced Queries
Goal: To create an interface for a school student management system.
|
In the real world you would not have users having full access to the tables and database.
Usually you will have an interface which acts as a layer between the user and the database. This interface can act as a security layer, as well as a visual aid to users. For the rest of this term we will be focusing on how to program an interface that controls the users experience |

|
Starting off...
|
This is a fake student database that holds a relational database that records all students attending a school in Te Awamutu.
Task: Open it up and have a look around the database, perform the following tasks: Create a query for Year 12 Male Students that live in Hamilton. |

| ||
The form wizard
|
One way of creating forms is through using the wizard.
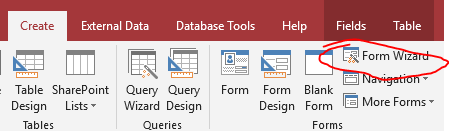
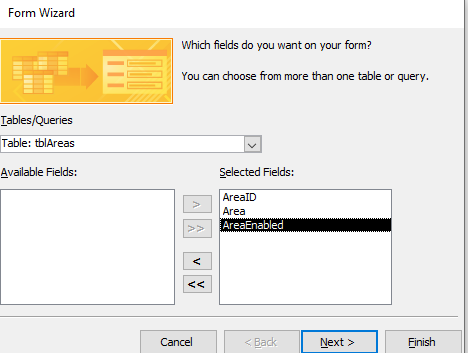
Normally I would refrain from using the wizard, however when creating forms for the administrator we could use this Task: Create 4 different forms using the wizard for managing Gender, Year Levels, Status and Areas. Form 1 - Areas 1.) Close any objects you have open (forms, queries etc) 2.) Click "Create" -- > "Form Wizard" 3.) Select "Table: tblAreas" 4.) Select all the fields 6.) Select "tabular" as the form type 7.) Save it as "frmAreas" Extra, See what happens if you choose other form types. Design View: Click the following icon under "design" to enter design view. 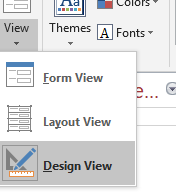
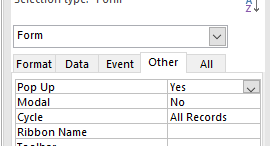
1.) Right click the form and click "form properties"
2.) Change the caption to something better then "tblAreas" 3.) Get rid of the record selectors, navigation buttons and make it a pop up form 4.) Change the title of the form away from tblAreas 5.) get rid of the close buttons and the control box. Locking boxes No one should be able to edit the AreaID, so lock this box by 1.) Right clicking on it and selecting properties 2.) Find the properties for Enabled and Locked and set them to: Enabled = No Locked = Yes This will make them un selectable, which we will use in the future. Task: Repeat this process for the rest of the Gender, Status, and Year level tables. |

|
Creating a main menu
|
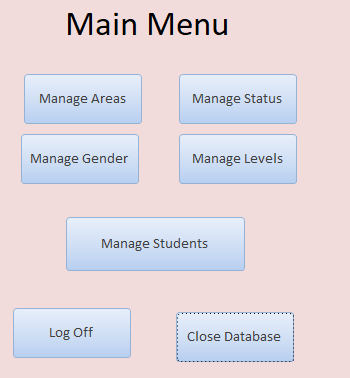
We are now going to create a main menu so that we can access these forms.
At the end of this project, the menu will load once the user has logged in. For now follow these steps: 1.) Click "create" -- > "blank form" 2.) Save it as "frmMainMenu" 3.) Dragging in Labels and buttons create the form pictured on the right. Use the following naming conventions Label = lblLabelName E.g. lblMainTitle Button = btnButton e.g. btnCloseDatabase Edit the properties of this form so that it pops out and navigation buttons are hidden |
|
Opening and closing forms.
|
Task - Learn from the instructions below to open and close forms and close the database.
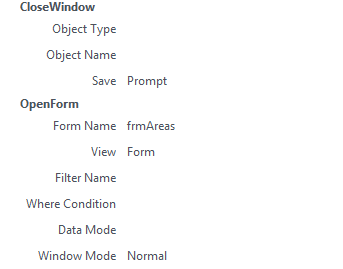
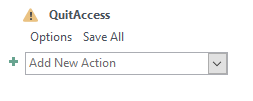
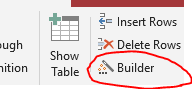
Opening and closing the Areas form 1.) Click on the Manage Areas button in design view. 2.) Click on the button properties and go to the "event" tab. 3.) Click the three dots next to on Click. 4.) Click "Macro Builder" then ok 5.) Replicate the picture on the right Pro Tip: Make sure you close the window first then open the new one, otherwise nothing will happen. 6.) Create a button on the Manage Areas form in the header that will exit the form and return to the main menu. Test that you can open and close the menu and the areas form. 7.) Repeat steps 1-6 for forms Gender, Manage Status, Manage Levels. 8.) To close the database use the macro command on the right, Make sure you save before you test it. |

For step 8 only!!!!
|
Custom Student Form
|
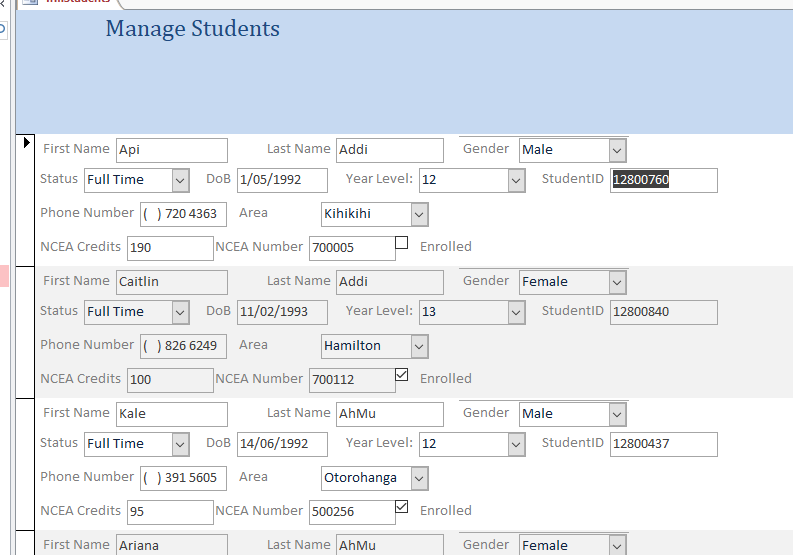
Now we are going to create a custom form to manage the students.
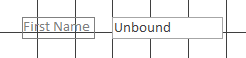
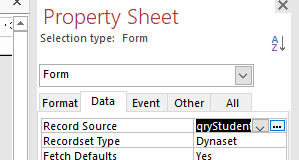
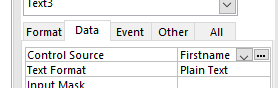
Initial Creation 1.) Click on "Create" Then "Blank form" 2.) Click "Title" under the header footer ribbon 2.) Create a title in the header called "Manage Students" 3.) Create an exit button in the footer, and link this form to your main menu 4.) Save the form as "FrmStudents" We are going to use the Header for searching, but more on that later. Create a Query to get all information. We are going to connect this form to a query rather then a table, you will see why at the end of this tutorial. For now follow these Steps: 1.) Create a new query, Select all tables 2.) Ensure that the following fields are among the query: StudentIDNumber, LastName, FirstName,Phone,Birthdate,EnrolledNextYear,NCEA_ID,NCEA_Credits, Gender, Status, Area, YearLevel, GenderID, StatusID, AreaID, YearLevelID, 3.) Ensure it is sorted by ascending last name, run the query and make sure that all students are showing. 4.) Save it as qryStudents Link your form to your query 1.) Create an text box with label showing "first name" 2.) Right click the form and select form properties 3.) Under data link the record source to the query you just created. 4.) Change the default view to continous 5.) Click on the unbound text box and set the control source to first name. 6.) Change the property default to continuous from single form 7.) View the form and you should be able to search through the 422 records. 
Task Create the rest of form.
Using text boxes, check boxes and list boxes create the rest of the form. Use the following standards for naming elements: Label = lblLabelName E.g. lblMainTitle Button = btnButton e.g. btnCloseDatabase Combo Box = cbxCombo e.g. cbxGender Check Box = chkCheck e.g. chkEnrolled Text Box = txtTextBox e.g. txtFirstName. |

Create drop down box for gender
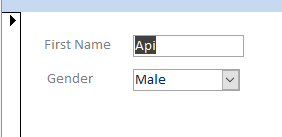
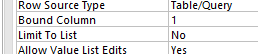
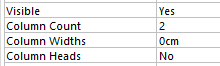
Just like the tables we can use drop down boxes to enter data 1.) Go to students form and drag in a combo box 2.) Go to the data tab and connect the Control Source to the GenderID 3.) Under row source click the three dots and create a query to grab the GenderID and Gender Name from the Gender table. 4.) Change the settings to match the following pictures:
Test this out you may need to reload the form
Excellence or Merit Tip:
By changing the tab Index order you can order what box is highlighted next by hitting tab... The first box on your form should be zero |
Custom Search & Form Based Queries
|
Looking through 422 records can be a real pain,
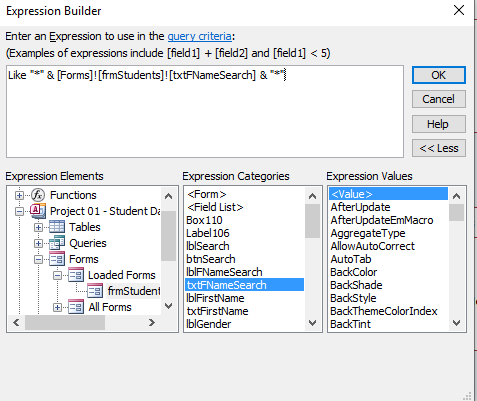
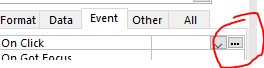
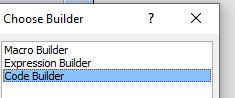
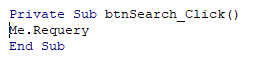
This is where we can use the header to create search boxes to help narrow down the search. Task: Create a search box for first name. 1.) Create a text box called txtFnameSearch inside the header. 2.) Create a button called btnSearch near it. 3.) Open your student Query in design view 4.) Click in the criteria under FirstName 5.) Click the Expression Builder 6.) Click on "Project one" --> "Forms" --> "Loaded Forms" --> "frmStudents" 7.) Find the text box "txtFName" and double click on it 8.) Surround the Forms line of code with this like "*" & Forms![frmStudents]![txtFNameSearch] & "*" Final Step and Intro to VBA 9.) Click on your search button on the form. 10.) Click on the "on click" event and the three dots to the side 11.) Click "code builder" 12.) Enter the code: me.requery 13.) Save close and reopen your query and form Sometimes closing and reopening is necessary. 14.) Test your search |

|
|
|
|
|
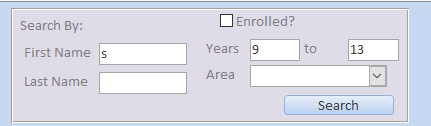
Creating more search buttons
Task 1. Create a search box like the one on the right Task 2. Get all of the search boxes to work 1.) Simply repeat the code for the last name 2.) Use < and > symbols for the years, You will need to change the table field for years from short text to number 3.) For Enrolled just use the form value of the box and ensure the default value is ticked 4.) run the re query code after the form loads. Task 3. Get the combo box to work 1.) Get the menu box to drop down with area values by using previous steps (don't pull in the Area ID) 2.) Use the same code as the first name and last name Extra for Experts: Create a clear search button that resets all searches back to their original format. You will need to use VBA code and null commands |
This:
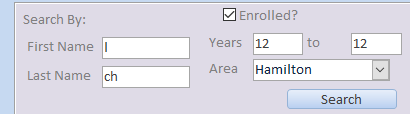
Should bring up only this

|
|
If you are really struggling and need to see a complete example download the link on the right
Final Cheat Sheet Here: |
| ||
Final Task
|
Create the same searchable forms for the prisoner database!!!
It should have A Menu A Wizard form for each look up table A custom form for the prisoners Searchable fields for the database |

|
